
Connection Groups let you combine multiple Vendor Connections into one reusable routing destination. Instead of adding every Connection separately to each Routing Group, you can add a single Connection Group and manage its Connections in one place.
A Connection Group is useful when a carrier provides two or more SIP endpoints that serve the same purpose. It can also be used whenever several Vendor Connections should be treated as one routing option.
The relationship between these objects is:
| Vendor | → | Vendor Connections | → | Connection Group | → | Routing Group Entry |
The Connection settings remain on the original Vendor Connection. A Connection Group only references its member Connections and defines the order in which they are used. If a Connection is updated, blocked, or deleted, every Connection Group that references it is affected.
A Connection Group can contain Connections from the same Vendor or from different Vendors. Only Vendor Connections can be selected as members.
Routing Policies
Each Connection Group has a Routing Policy that controls how the first Connection is selected and how the Connections are presented to the routing process.
- Ordered – the system starts with the first member and processes the Connections in the configured order. Use this policy when one Connection is primary and the others are backups.
- Round-Robin – the system rotates the Connection selected for the first attempt. The rotation occurs for each new routing request, regardless of the outcome of the previous call.
The usual Connection and routing rules still apply. For example, a blocked Connection is not available for routing, Capacity and Max CPS settings remain in effect, and Huntstop SIP Codes can prevent the system from trying another Connection after a response from a group member.
Opening the Connection Groups Page
Go to Vendors > Routing > Connection Groups.
The Connection Groups page displays the following information:
- Name – the Connection Group name. Click it to open the group
- Routing Policy – Ordered or Round-Robin.
- Description – optional information about the group's purpose.
- Members – the number of Vendor Connections in the group.
- Action – the option to delete the group, if permitted by the user's access level.
Use the Name filter to find groups whose names match or do not match the entered value.
Creating a Connection Group
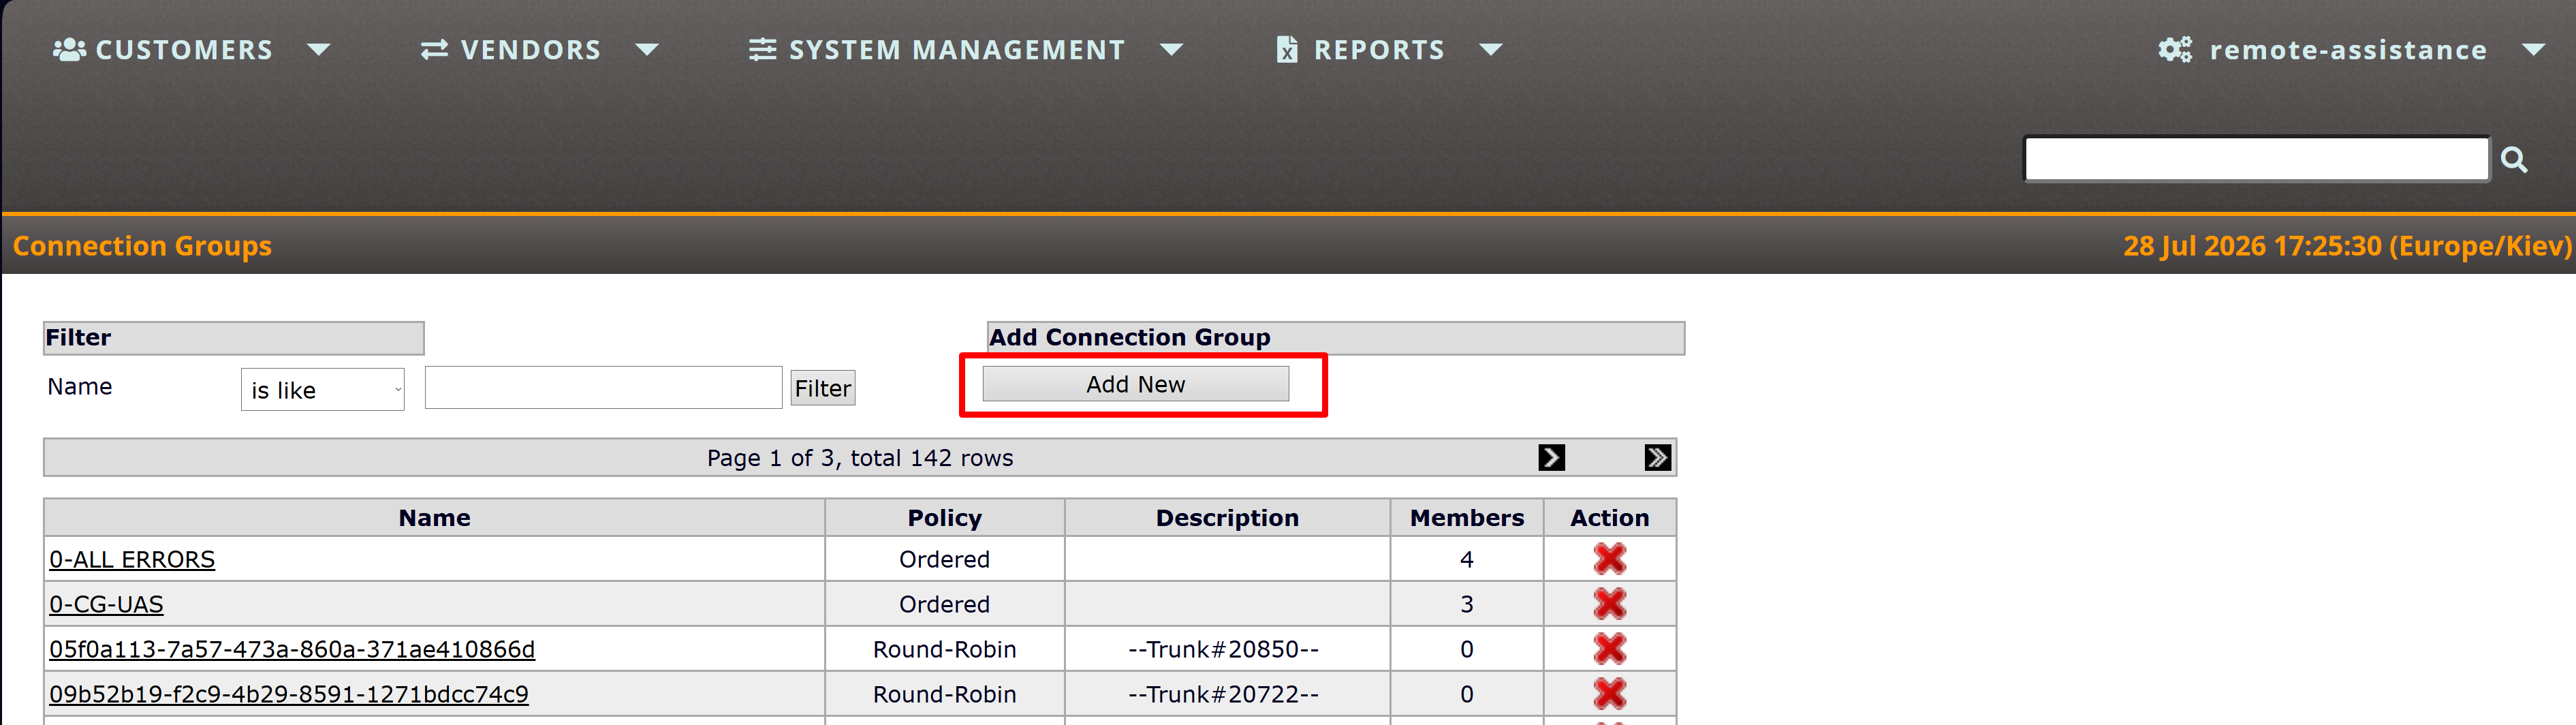
- Open Vendors > Routing > Connection Groups.
- Click Add New.
- Enter a unique, descriptive Name. This field is mandatory.
- Optionally enter a Description.
- Select the Routing Policy:
- Ordered for a fixed primary-to-backup order.
- Round-Robin to rotate the first Connection used for successive calls.
- Click Save to create the group and continue adding members, or click Save & Close to return to the list.
The Members section becomes available after the Connection Group is created. If you selected Save & Close, open the group again by clicking its name.
Adding Connections to a Group
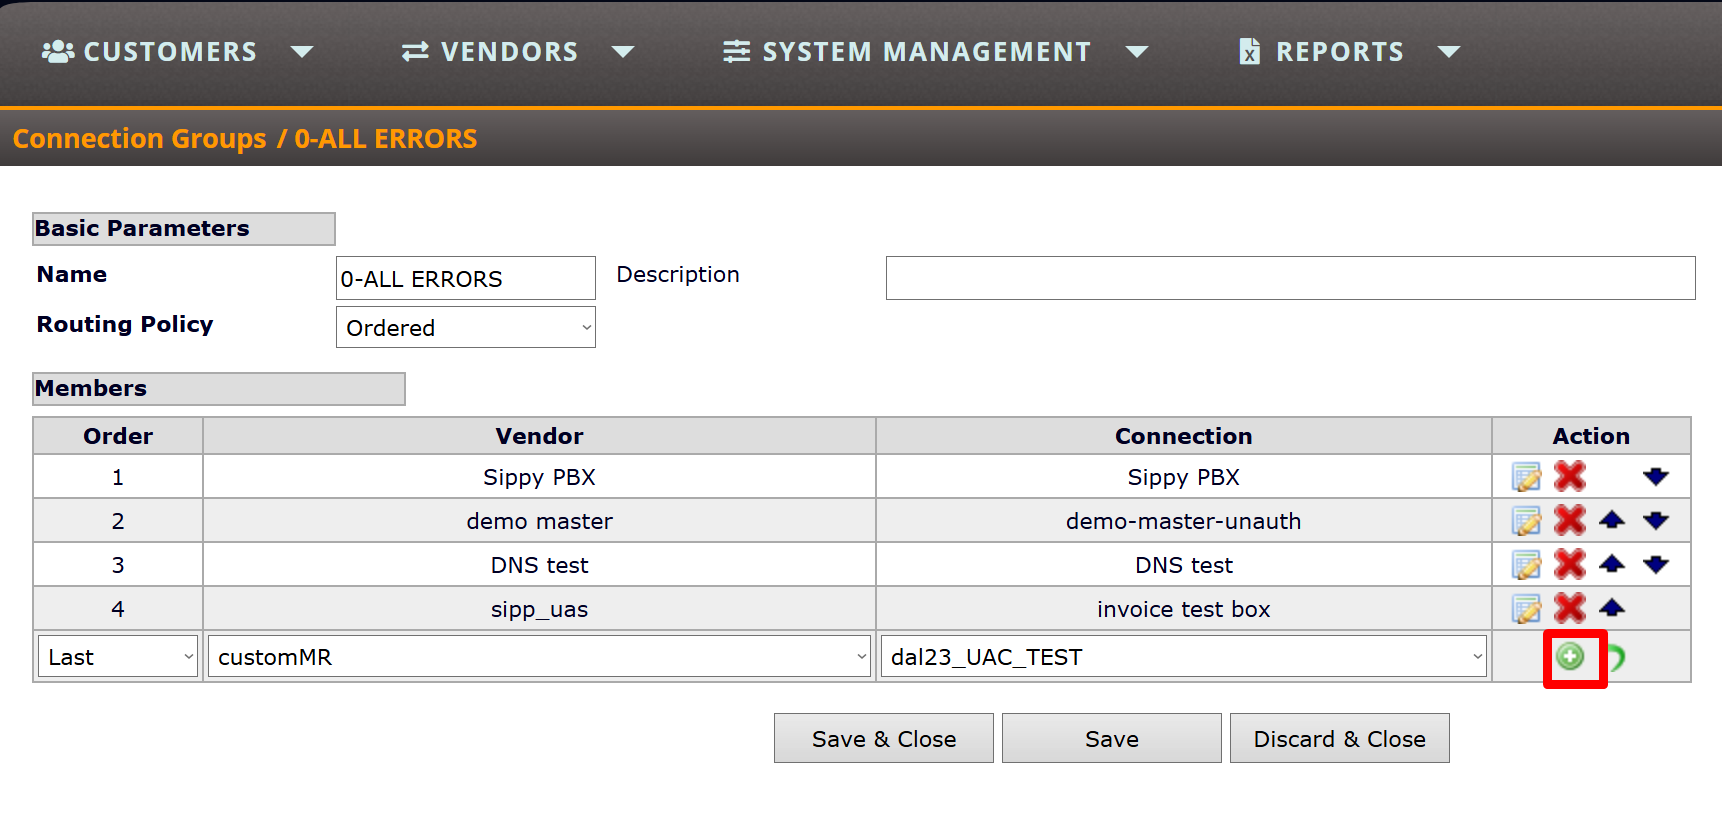
- Open the required Connection Group.
- In the empty row at the bottom of the Members table, select the required Order:
- First places the Connection at the beginning.
- A number places the Connection at that position.
- Last appends the Connection to the end of the group.
- Select a Vendor. Only Vendors that have Connections are displayed.
- Select one of that Vendor's Connections.
- Click the green Add Row icon in the Action column.
- Repeat these steps for every Connection that should belong to the group.
Note: A selected member is not added by the page-level Save or Save & Close button. Click the green Add Row icon to commit each new member.
Managing Group Members
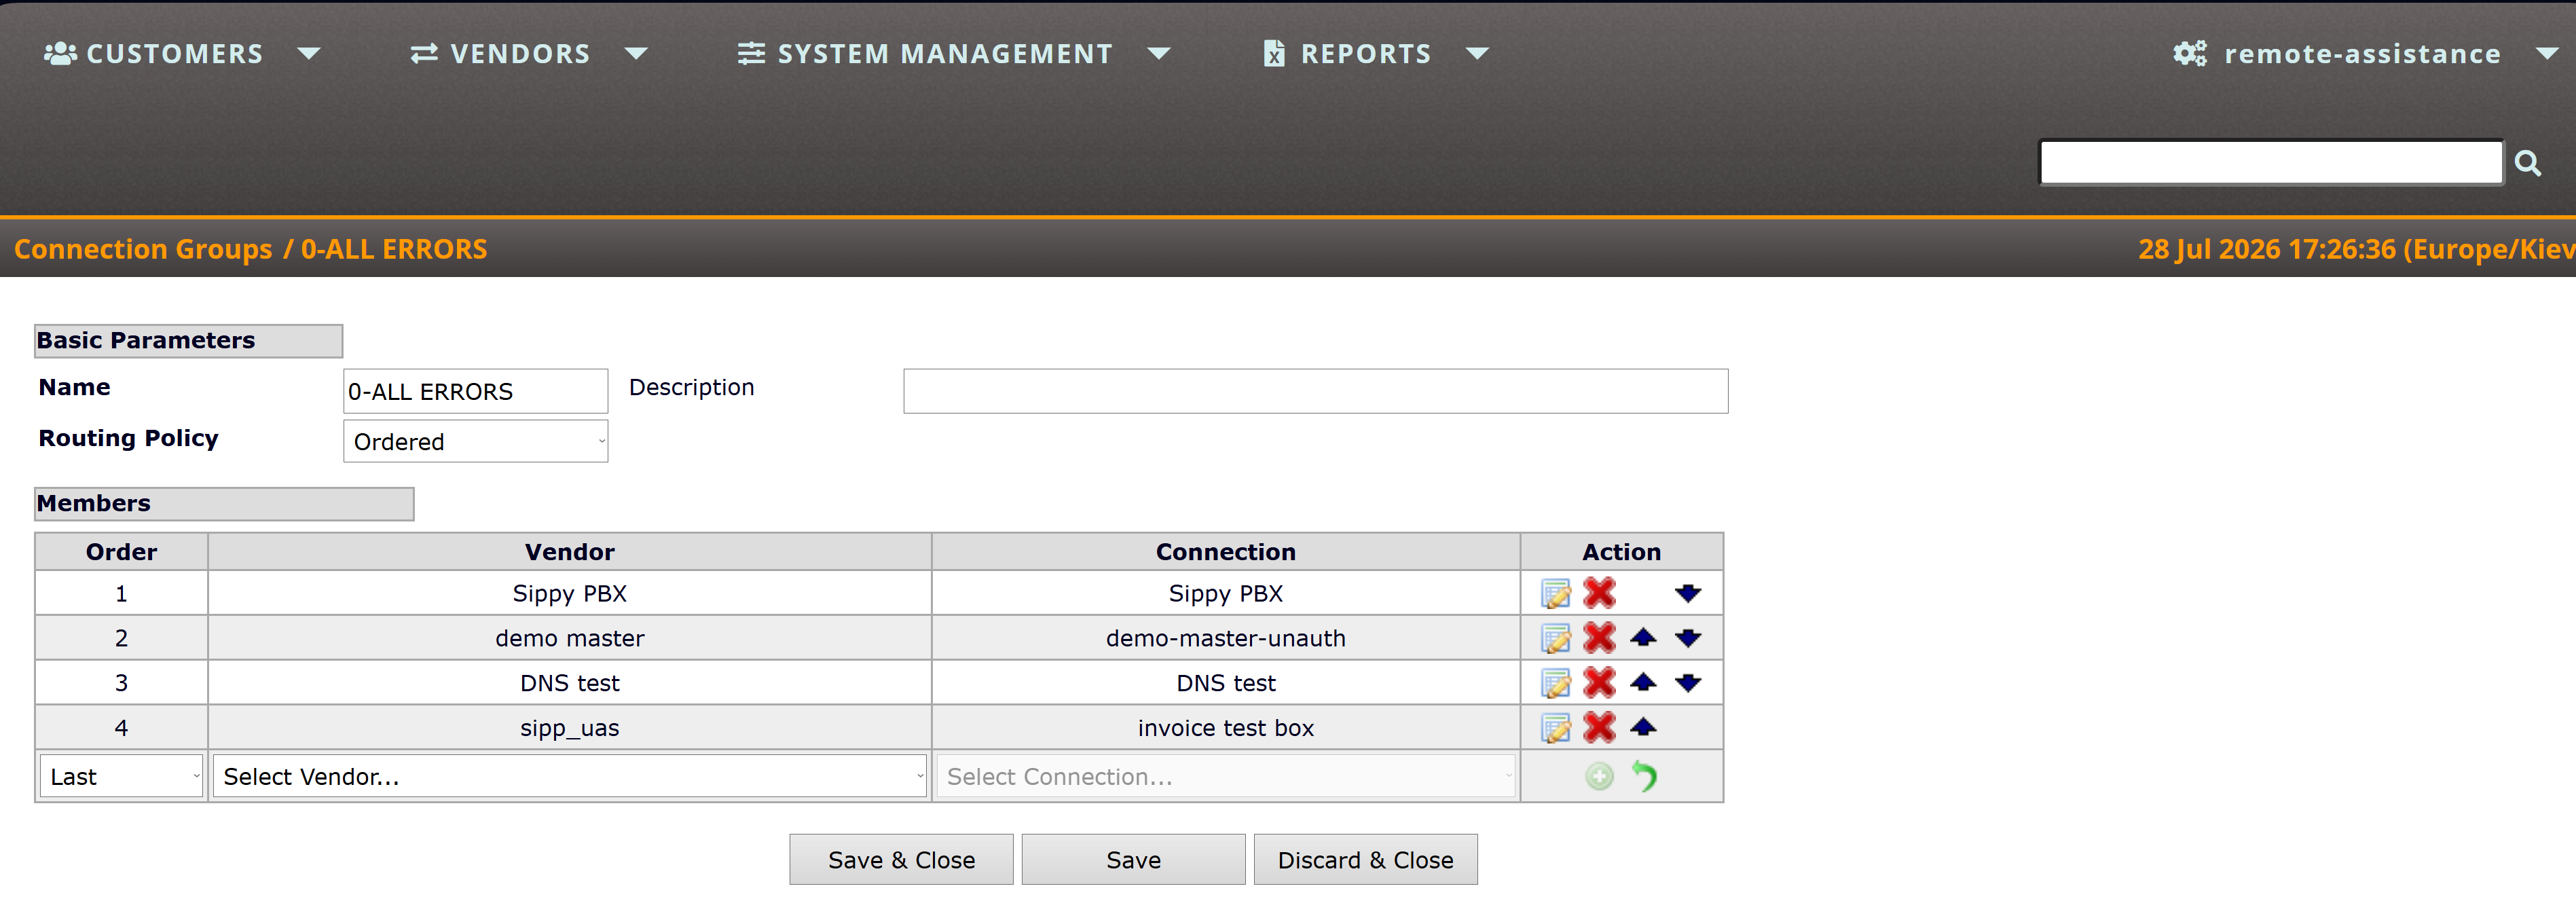
The Members table shows each member's Order, Vendor, and Connection. The icons in the Action column provide the following operations:
- Edit – change the member's position, Vendor, or Connection. Click the Save icon in the row to apply the change, or Undo to cancel it.
- Delete – remove the Connection from this group after confirmation. The Vendor Connection itself is not deleted.
- Up / Down – move the member one position up or down.
- Undo in the new-member row – clear the current Vendor and Connection selection.
Changing the group policy, adding or removing a member, or changing the member order updates the routing configuration that uses the group.
Adding a Connection Group to a Routing Group
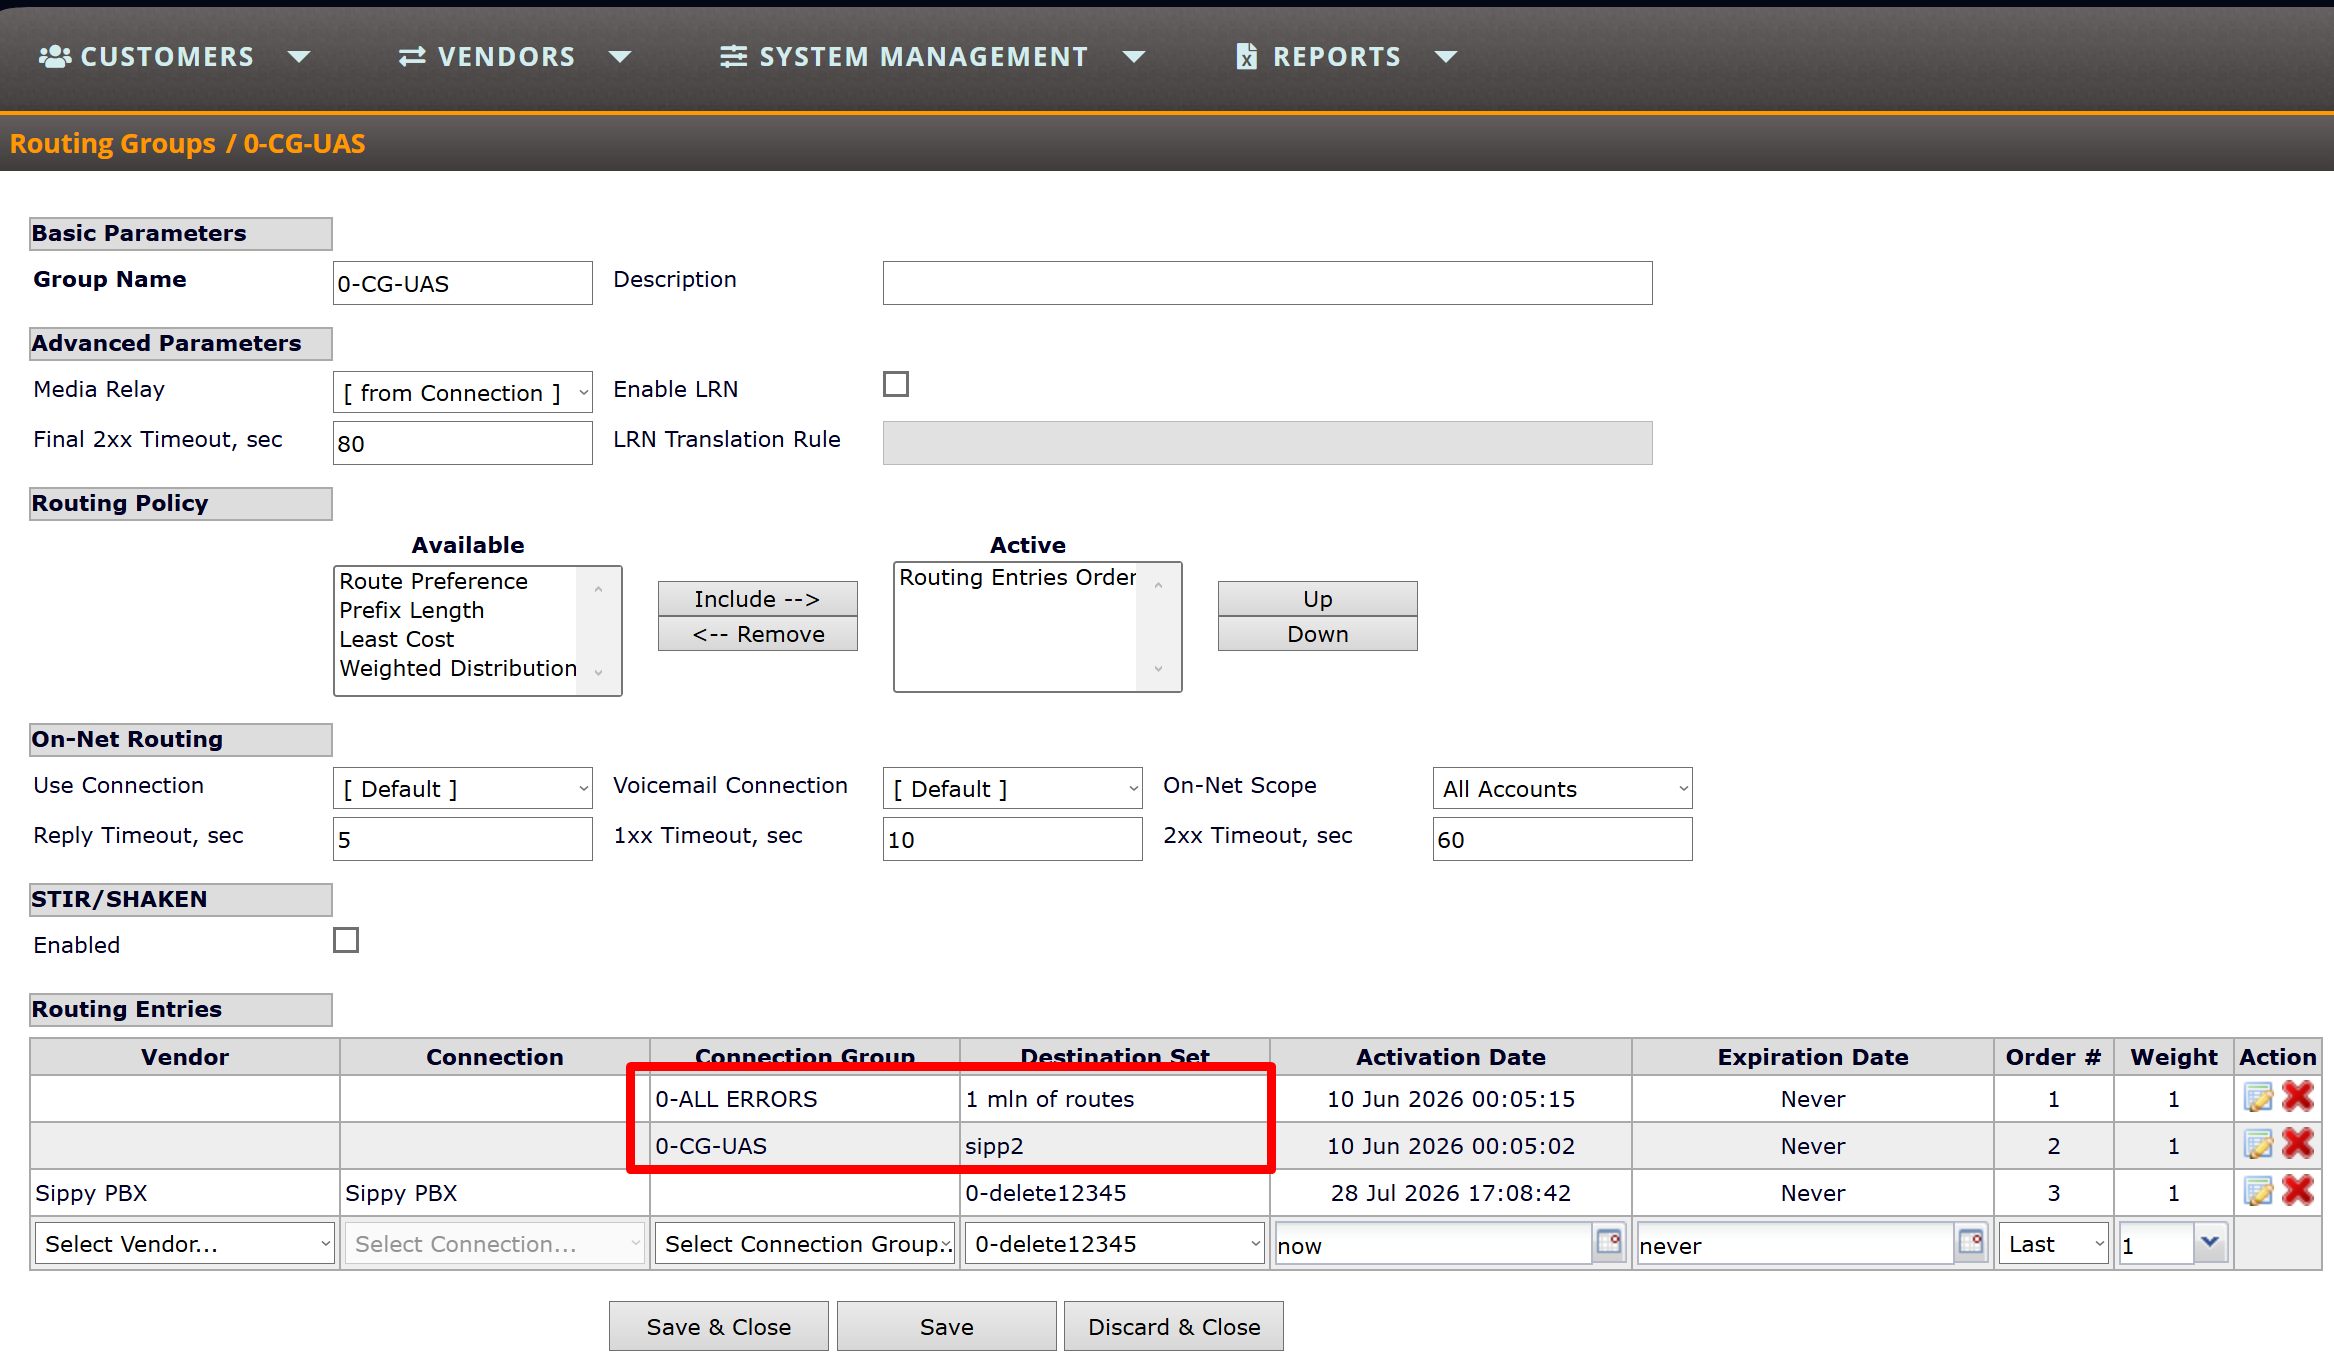
- Go to Vendors > Routing > Routing Groups.
- Create a new Routing Group or open an existing one.
- In the new row under Routing Entries, select a Connection Group. The Vendor and Connection fields are disabled because a routing entry can use either one individual Vendor Connection or one Connection Group.
- Select the Destination Set.
- Configure the Activation Date, Expiration Date, STIR/SHAKEN mode (when available), Order, and Weight in the same way as for an individual Vendor Connection.
- Save the entry.
In a Routing Group, the Connection Group is one routing entry. The Routing Group's Order and Weight determine when that entry is selected relative to other routing entries. After the Connection Group is selected, its own Ordered or Round-Robin policy determines the sequence of its member Connections.
The Destination Set, CLD and CLI Translation Rule on Destination Set and other parameters configured on the Routing Group entry apply to the group entry. Connection-specific settings such as CLD and CLI Translation Rules, Capacity, Max CPS, media relay options, and Huntstop SIP Codes continue to come from each individual Vendor Connection.
Empty Connection Groups
The system allows a Connection Group with no members to be added to a Routing Group. However, an empty group provides no destination for a call. Add at least one active Vendor Connection before using a Connection Group in production routing.
Editing or Deleting a Connection Group
To change a Connection Group, click its name on the Connection Groups page. You can update its Name, Description, Routing Policy, or Members.
To delete a Connection Group, click the Delete icon on the Connection Groups page and confirm the action.
Important: Deleting a Connection Group also removes Routing Group entries that reference it. Before deleting a group, review the Routing Groups that use it and replace or remove those entries as required. Deleting a Connection Group does not delete its Vendor Connections.
Call Attempts and Vendor CDRs
When the system routes a call through a Connection Group, each actual attempt is associated with the Vendor Connection that handled that attempt. Vendor CDR reports therefore show successful and failed attempts made through group members, including zero-duration attempts.
If a call does not use the expected member, check the following:
- The Connection Group contains the intended Connections in the correct order.
- The selected Routing Policy is correct.
- The group is added to the correct Routing Group and Destination Set.
- The Routing Group entry is active and has the expected Order and Weight.
- The Vendor Connection is not blocked and has available Capacity and CPS.
- Huntstop SIP Codes on a member Connection are not stopping further attempts.
Example
A Vendor provides three SIP endpoints:
- Vendor A - Primary
- Vendor A - Backup 1
- Vendor A - Backup 2
Create a Connection Group named Vendor A Termination and add the three Connections in that order.
- With the Ordered policy, each call starts with Primary, then can proceed to Backup 1 and Backup 2 if hunting is allowed.
- With the Round-Robin policy, successive calls start with Primary, Backup 1, Backup 2, and then Primary again.
Add Vendor A Termination to every applicable Routing Group. If the Vendor later adds or replaces an endpoint, update the Connection Group once instead of editing every Routing Group separately.